How to configure OpenRMA Software to work on your own local or local network database.
By default, OpenRMA Repair Centre software works with a cloud demo database shared with other users trying our demo version.
After you purchase and activate the software, you may want to work with your own private database, to store your customers, services and other data.
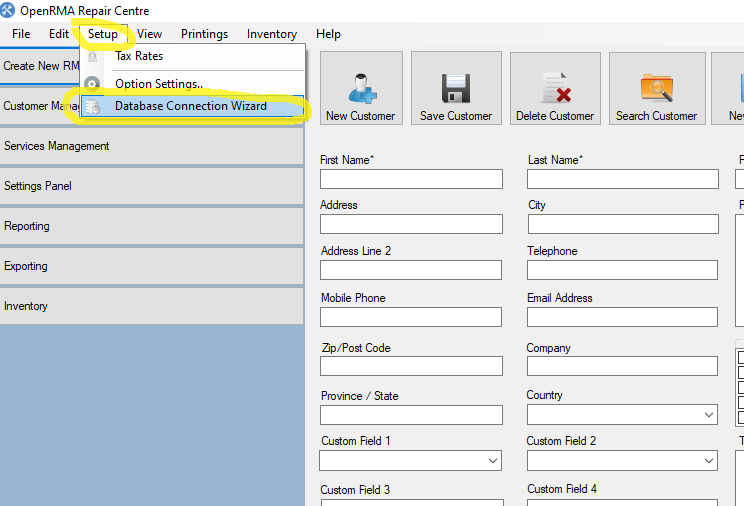
To do so, Press Setup from Main Menu and select Database Connection Wizard as shown in the picture bellow.
Next you are presented with an easy to use connection Wizard that will guide you in 2 simple steps to connect with your local or cloud database server. Press Next to continue.
You have 3 options here.
- Connect OpenRMA Software with our Demo database so you can continue test drive the software.
- Connect OpenRMA Software with your own local or local network database.
- Connect OpenRMA Software with our Cloud database option that you purchased from our website.
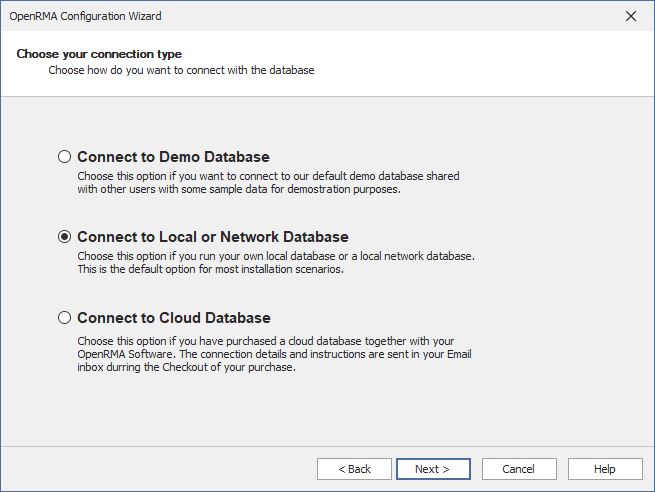
The most Common scenario is to connect OpenRMA Software with your local computer database or to a local network computer that act as a ‘server’ or ‘Main Computer’ that will run the database server. If this is your case scenario check the middle radio button “Connect to Local or Network Database” and click next.
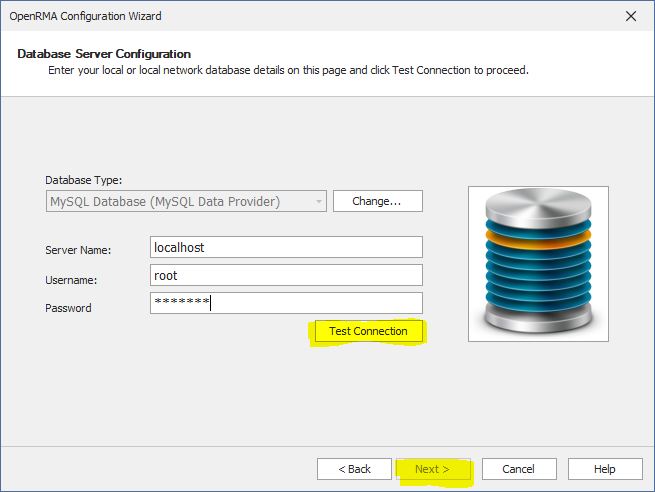
Now the wizard asks for your database server details. if the database is on your local computer then these default settings will do the work for you.
Click Test Connection button as shown in the picture. If the connection details are correct, then the Next button will be enabled and will be able to finish the connection wizard.
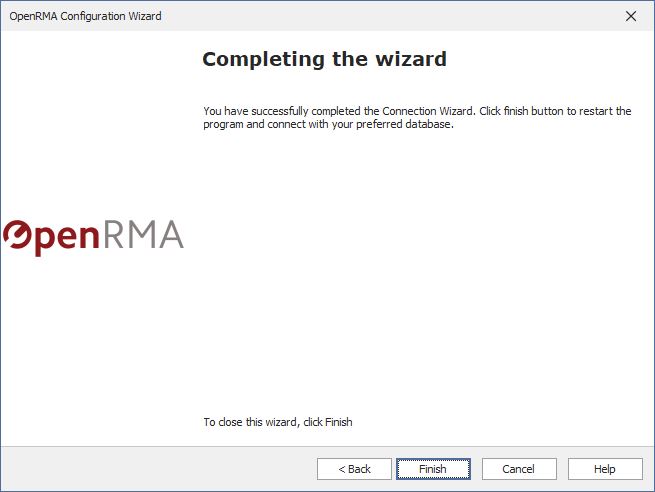
You have completed successfully the connection wizard here and when you press finish the software will restart and you will be ready to use it with your private database configured.
CLOUD DATABASE OPTION
In case you have selected option 3 in the previous step of the wizard (Cloud database option) and you have purchased a cloud database from our website
you will have your database connection details in your email that sent immediately after your checkout.
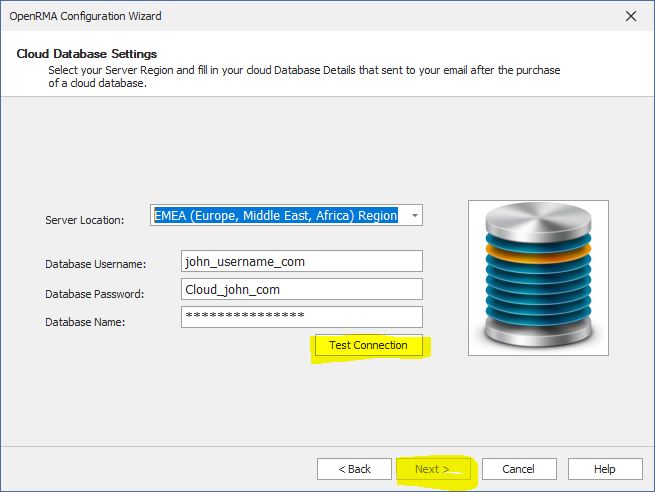
In this step you need to select the location of the database you purchased. Choose EMEA is you purchased a database for the Europe Region, or US if you purchased a database for USA or CANADA Region.
Fill in your database Username, Database Password and Database Name The details are in the email you received after the purchase of the cloud database.
Finally click Test connection to verify the details you entered. If the details are correct, then the next button will be enabled and it will be allow you to finish the Wizard.