Repair Orders Overview
- introduction
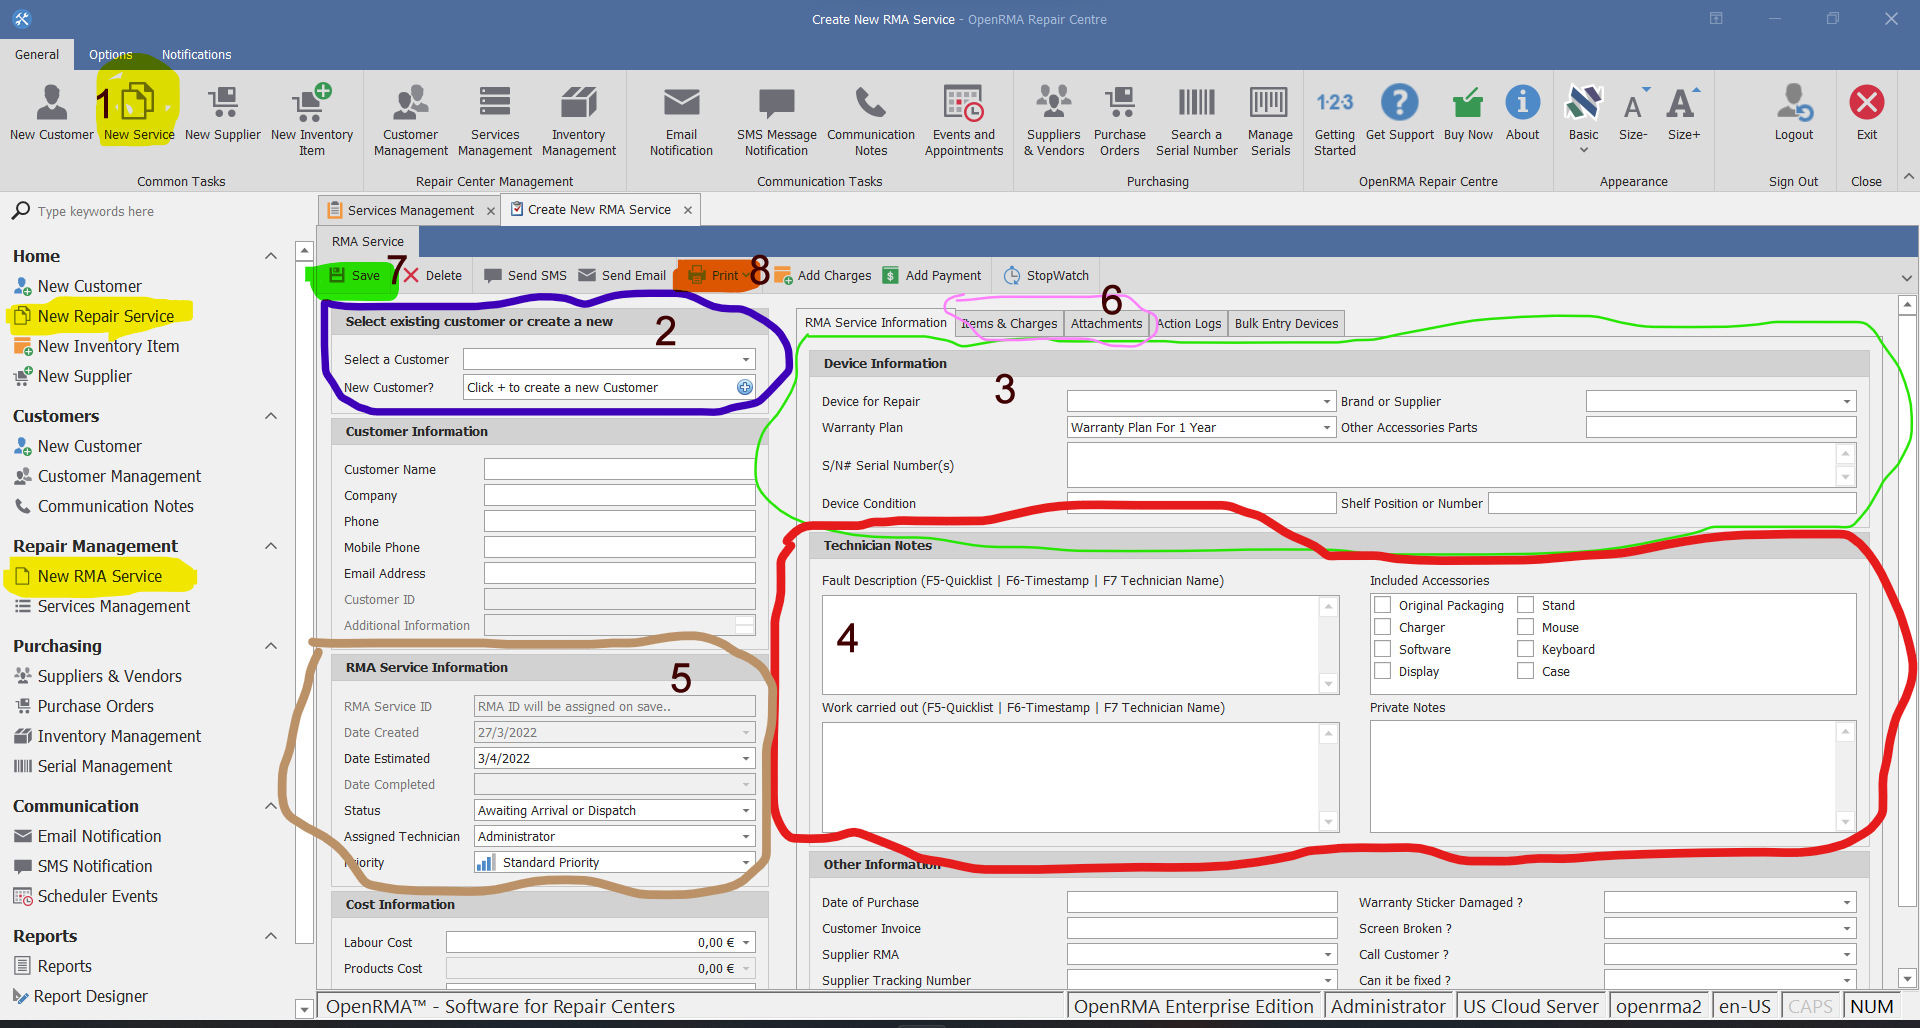
To open the New Repair screen, click the New Service button (see screenshot Yellow point 1) on the Main Menu or Home ![]() New Repair Service from the left sidebar menu, or New RMA Service from the left sidebar Repair Management Section (See yellow points on Screenshot).
New Repair Service from the left sidebar menu, or New RMA Service from the left sidebar Repair Management Section (See yellow points on Screenshot).
This is the most common screen you will use in the software in order to create a new repair, check-in a new customer or bulk import devices for repairs from your customers.
To begin, we need to select a customer to whom this repair service will belong. Click the select a customer drop-down (see screenshot Point 2 in Blue section). You can start search for an existing customer by name, company, phone and many other filters. If you need to create a new repair for a new customer that not exists into the system, you need first to create the customer by clicking the + sign bellow. Then you need to follow this guide to create the customer first.
Next we need to select the Device that is going to be repaired (see screenshot Point 3 in Green section).
After selecting our device for repair and device details (make, model, serial, warranty and condition fields), we need to give a Fault description and or Technician or Private notes for our reference (see screenshot Point 4 in Red section). You can press F5 for a Quick List of frequent used faults so you don't have to type it all the time. You can also use F6 button to insert the current Date-Time stamp or F7 to insert the current Technician's name.
Optionally we can choose the default Repair Status, assigned technician or estimate completion dates (see screenshot Point 5 in Brown section)
You can also use the tabs on Point 6 on the screenshot to add Items and Parts that you will use on this repair and charge the customer, but you need to save the repair first in order to use these functions, like warranty plans, proof of purchase receipt, photo of the product and so on.
Finally click the SAVE button (screenshot Green spot 7). This will save the repair into the system and it will ask you if you want to print the repair form (check-in form). For example many repair shops prints 2 copies of the check-In form (one for their records and one for the customer). Other repair shops just print a small receipt ticket for a customer reference. Some others don't print anything. It is up to your business workflow if you want to follow this step.
That was in short, the process of creating a new repair for an existing customer and check-in a customer with a new RMA repair service.
See also: Managing existing repair services.